
> FLATTIE
> ROUND STERN > BOATSHOP DIORAMA > POWER SKIFF > DRAKETAIL > HEAD BOAT > MINI ROUND STERN > MESSENGER > STERN CUTAWAY > SHALLOP > DELAWARE > SAILING SKIFF > ROWBOATS > WRIGHT SKIFF > F.D.CROCKETT > PRINCESS > EMMY'S DIORAMAKITS FOR NOVICES TOOLS TECHNIQUES MUSEUMS LINKS ABOUT ME
July, 2017
I am starting a new scratch-build project - a Chesapeake Bay flattie.
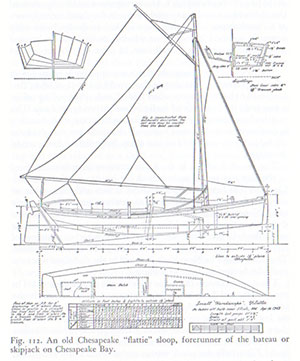 I am using plans drawn by Howard I. Chapelle as shown in his book, American Small Sailing Craft. Full-size plans (at 1:16 scale) are available from the Smithsonian.
The lines for these plans were taken off an existing boat that was built around 1880 or 1890. This boat was also called a "handscraper" because it was used to drag an oyster dredge that was raised and lowered by a manually operated "winder" or winch.The original was 25' 8-1/4" between perpendiculars so the model at 3/4" scale (1:16) will be just over 20-1/2" between perpendiculars. Because of the rudder, the overall length will be a bit longer.
At the time of starting the model (July 15, 2017) I do not yet have the plans from the Smithsonian, so I am using the table of offsets provided in the book to draw up the molds for each station. As of July 16, I have all the molds drawn as well as the keelson. Wood cutting starts tomorrow!
For those who may be interested in acquiring the plans from the Smithsonian, here is the info you will need:
Plan: ASSC-112
Plate: 112-311
"Handscraper" Flattie c. 1900
Lines, offsets, details, sail, spar and rigging plan, scantlings
3/4" scale
Price: $10 (the plans are on a single sheet) + $5 shipping and handling
You must send your order by surface mail to:
Ship Plans
Smithsonian Institution
PO Box 37012
NMAH 5004 / MRC 628
Washington, DC 20013-7012 USA
July 17, 2017
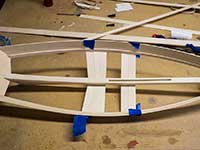
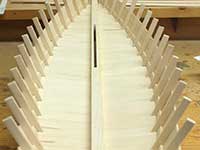
Today, I got the top parts of the molds and the keelson cut out. There is still a part of the molds that goes between the sheer line and the build board that I haven't cut out yet. There's also more work to do to the keelson, such as cutting out the centerboard notch. And, the molds will have to be beveled before I glue them down to the build board. So a ways to go yet before I start planking, but it's beginning to look like a boat!
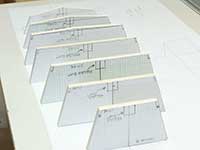 Molds |
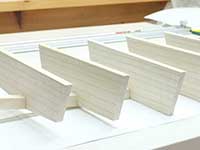 Molds and Keelson |
July 24, 2017
A couple of days ago, I got the first plank on the starboard side. As of today, there are two planks on each side and I've started planking the bottom. The remaining side planks will get added after I install the side frames.
 Chine Log |
 Planking |
July 26, 2017
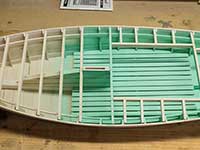
I now have the bottom planked, two planks on each side of the boat, and all the side frames installed. There will be one more side plank and a wale added to this.
 Frames |
 Planking |
July 26, 2017
Sides are now fully planked. Next step will be to put the deck clamps inside the frames and them make and install the deck beams.
 Planking |
 Stem |
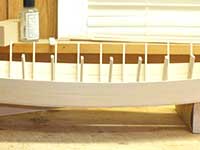
August 5, 2017
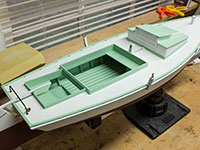
The centerboard trunk, platform under the hold and cockpit, and the deck beams are in. I just got all the deck beams in today. When they are good and dry tomorrow, I will sand them all even so the deck planks will lay flat. Next step is to make the coamings for the cabin, hold, and cockpit, then the deck planking can go on.
 Deck Beams |
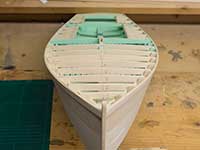 Deck Beams |
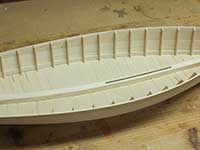
August 13, 2017
Spent the last few days making all the coamings and planking the deck. There is a rub rail that will cover the transition between the deck planking and the side planking. Haven't made that yet. Then there a toe rail that will go on top of the deck near the outside edge. Haven't made that yet either.
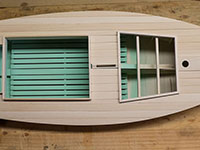 Deck Planking |
 Deck Planking |
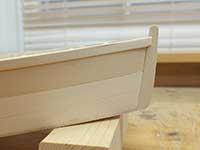
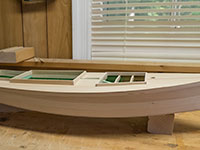
October 3, 2017
I've been on a bit of a vacation for a couple weeks and September was filled with projects around the house, so not much progress.
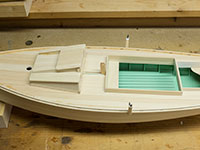 Overall |
 Rudder |
 Cabin |
 Oarlock |
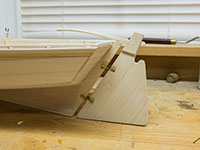
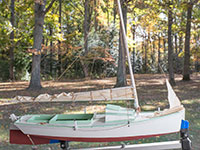
November 06, 2017
So, my vacation ended in early October. Then I had some health issues, and then, for a long time, I just didn't feel like working in the boatyard at all. I've finally gotten back to it in the last week or so and progress photos are shown below. Next step is to work on masts and spars and rigging.
 Progress Photo |
 Progress Photo |
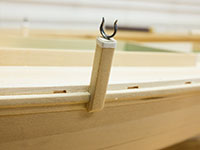
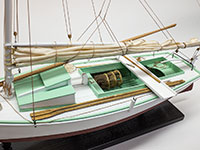
November 11, 2017
I finished the rigging today. I haven't added the centerboard yet - I want to wait until the model is permanently mounted. The next step will be to add deck stuff like oars, baskets, etc.
 Progress Photo |
 Progress Photo |
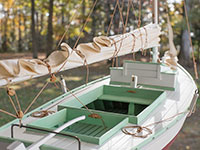 Progress Photo |
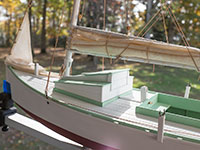 Progress Photo |
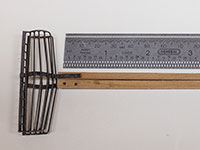
November 13, 2017
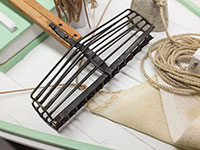
I have spent the last two days making a set of oyster tongs. LOTS of soldering!!
 Oyster Tongs |
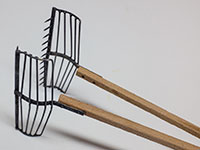 Oyster Tongs |
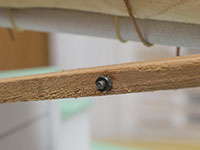 Pivot Bolt |
 Oyster Tongs |
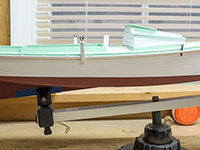
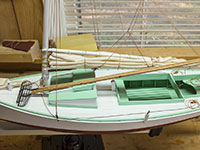
November 19, 2017
The model is officially finished as of today!!
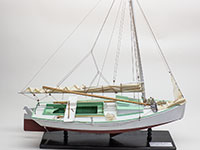 Finished |
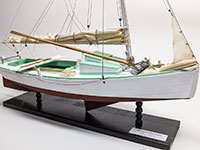 Finished |
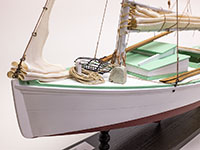 Finished |
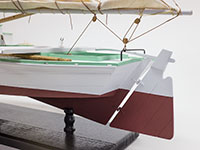 Finished |
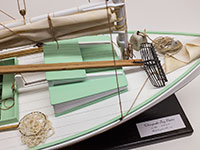 Finished |
 Finished |
 Finished |
 Finished |
Copyright © 2025 - John H. Earl
All Rights Reserved.
Problems with the site? Contact the Web Master
Last Updated:
January 8, 2025