
> DRAKETAIL
> HEAD BOAT > MINI ROUND STERN > MESSENGER > STERN CUTAWAY > SHALLOP > DELAWARE > SAILING SKIFF > ROWBOATS > WRIGHT SKIFF > F.D.CROCKETT > PRINCESS > EMMY'S DIORAMAKITS FOR NOVICES TOOLS TECHNIQUES MUSEUMS LINKS ABOUT ME
July 25, 2018
I have been working on the boatshop diorama off and on, but it hasn't been sparking my interest very much lately, so I've decided to get back to boat building. I don't intend to abandon the boatshop. I'll work on it from time to time while things are drying or what not on this boat.
I'm using plans from Wye River Models although I am enlarging them by 150% so this boat will be at 1:16. LOA will be about 32", which will make it about the same length as my round-stern although narrower in beam (roughly 5-5/8"). I also plan to change the cabin configuration. I want to add a small upper section with some windows. The WRM plans are very simplistic, so I'm sure I'll be making other mods as I go along.
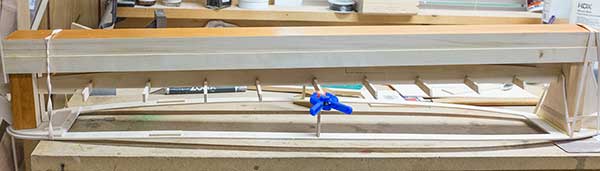
Today, I got the enlarged keel cut out and the strongbacks cut to length. They are not yet glued into the keel. Just sitting there for purposes of the picture.
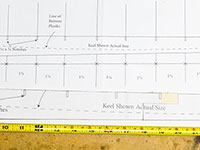 Enlarged Keel |
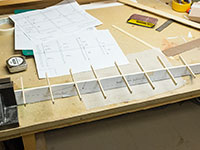 Keel & Strongbacks |
July 27, 2018
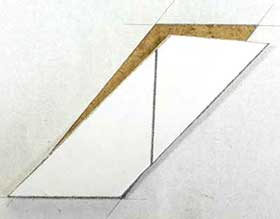
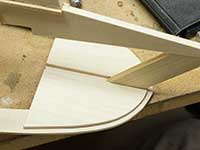
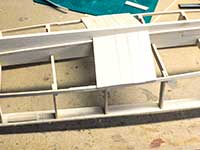
Oh, these plans! Possibly the worst I've ever seen. Below are just two examples of many. In the picture on the left, the darker portion is the shape of the stern support as drawn on Template Sheet. Sitting on top of it is the drawing of the stern support from the sheer plan on Sheet 1. The bottom of each is aligned. That's where the support would be glued to the keel, Clearly they are much different. And who knows which (if either) is correct? I decided to go with the one on the sheer plan. Fingers crossed.
In the picture on the right, I'm showing where a side plank is supposed to lie on the outside edges of the strongbacks. As you can see on the one in the middle (#4) it is much wider than it should be and a considerable amount will have to be cut off. At first, I thought I'd swapped two strongbacks when gluing them in - #4 and #5 are very close to the same size. But, careful measuring shows that's not the case and laying then over the plans, I can see they match the drawing. But #4 is certainly wrong and drawn that way. I expect to do a bit of fairing on any hull, but this is ridiculous.
Also, I haven't shown bulkhead 1. It is curved on each side so that it defines the flare at the bow. Turns out the two sides are not at all symmetrical. Very sloppily drawn. Plus the template drawing shows it is notched at the bottom, when it fact, it should be solid because it fits into a notch in the keel.
I built a crab scrape from Wy River plans several years ago and while I expected very simplistic plans for the draketail, I didn't expect them to be so badly done. Very disappointing. I do NOT recommend this boat for any modeler who doesn't have a good deal of experience or access to help from someone who does. Sigh. Moving on.
July 28, 2018
I now have the deck cut out and glued on and am working on the frames. Before I glued the deck in place, I made some support for the staving on the underside of the deck at the stern. I just felt like it would make things easier when I plank that area.
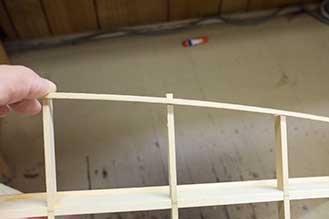
I ran into another issue with the instructions. Step 4 says to put a side plank along the outside ends of the strongbacks. Now, there is no mention anywhere about the ends of the strongbacks, so one assumes they should be perpendicular to the top - that is, squared off.. So if you put on a side plank at this point, you're going to wind up with it being also perpendicular to the top of the strongback. That would be wrong! When you get to adding the frames in Step 6, you'll discover that the ends of the strongbacks have to be cut to the same angle as the frames. See the picture below. Fortunately, I realized the issue before I glued on that bottom plank, so I decided to install the frames first. That way, I can sand down the angle of the strongback exactly to match the angle of the frame. Adding the frames takes some time and care, so it will take a few more hours to get them on.
 Frame |
 Staving Support |
July 30, 2018
Once I got the deck glued on and started adding frames, I suddenly became aware of a big problem. The frames on the port side were sitting at a different angle than those on the starboard side. The deck was off-center, but It took me a long time to figure out why and I had to remove the deck and frames to find the problem. The first thing was the stern support was not perfectly perpendicular to the keel. It leaned over toward the starboard side a bit. The second problem there was a short section of the deck that was about 1mm wider on one side than the other. And the third problem was that the keel itself was slightly warped.
In the end, I wound up making a sort of upside-down build board. The heavy, upper part holds the keel straight. I also glued on upright supports to keep the stern support and stem perpendicular to the keel. Then, when I finally glued the deck back on, I was VERY careful to assure that it was centered from side to side.
So, basically, it was just plain sloppy work on my part. I simply should have been more careful as I assembled things. Amazing how small errors can compound quickly into large problems! A couple of days wasted but I'm much happier with things now.
August 2, 2018
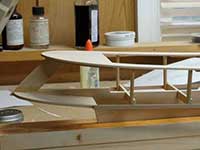
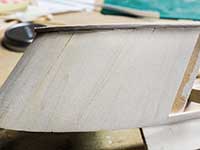
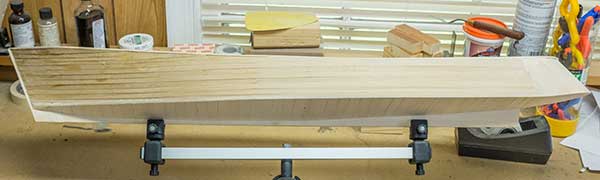
The boat is all framed in now and I no longer need the build board. The hull is looking MUCH better and the deck is nicely centered over the keel. I got the stern staving on yesterday afternoon and this morning. This afternoon, I started working on the bottom planking. That will likely take a couple of days to complete.
 Hull |
 Hull |
 Stern Staving |
 Bottom Planking |
August 11, 2018
It took a while, but the last hull plank went on at 3:30 this afternoon. Looks pretty ugly right now, but once I do a bit of sanding and add a few strategic dabs of filler, it should look OK. Of course, painting it will help hide it all as well. Can't say I really enjoyed planking this one and I'm glad to have this part behind me. The instructions call for adding the coamings and cabin next, but I will likely do the rub rails and toe rails first. Seems easier to me because there's less chance of damaging the cabin.
September 03, 2018
I have been really busy with outside work in recent weeks, so I haven't had much opportunity to work on the boat. As you can see below, I have the toe rails and rub rails on, the hull primed, and the cabin sides and coamings installed (just did those today). As well, the inside of the hull is painted. It looks kind of light blue in the picture but it's actually a light gray. Might have a little blue in it though.
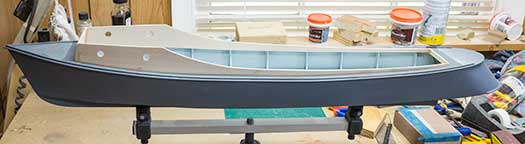
Hull as of Sept. 3
September 7, 2018
I've made some decent progress over the past few days. I spent a couple days working on the cabin's aft bulkhead and doors. That allowed me to make the upper section of the cabin as well as the roof for the lower section. I also made the portholes today. There are a couple things left to do in this area. First, the lower section of the cabin and the coamings need to be painted. I have to cut the plastic to go in the windows of the upper cabin, and either do plastic or modpodge in the portholes. Of course, the outside of the hull isn't painted yet either, so I'll do that plus the cabin and coamings at the same time.
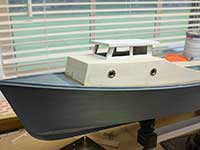 Cabin |
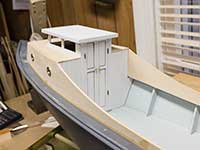 Cabin |
September 10, 2018
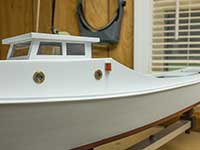
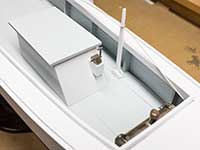
Major construction is all done now and the hull and cabin are painted. Of course, there are many details yet to add. The rudder is done but not yet installed because I'll want to make and install the prop first. The engine box is going to need some throttle controls so the box isn't glued in place yet. I'll do more work to the exterior of the cabin and then there are all the fun details I'll need to make for the inside of the boat. I haven't decided on a name for this boat yet, but that will have to be added when I do. So, still a good ways to go.
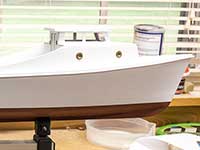 Starboard Side |
 Interior |
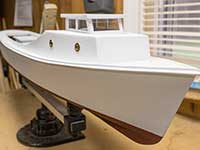 Starboard Bow |
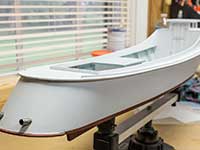 Aft |
September 11, 2018
Made the prop today and got it and the rudder installed.
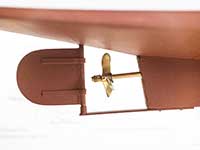 Prop & Rudder |
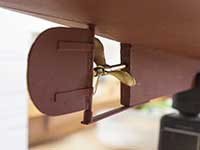 Prop & Rudder |
September 15, 2018
Spent the day working in the boatyard and got the running lights made as well as the engine controls. I made the steering stick as well, but don't have it installed yet.
 Port Running Light |
 Engine Controls |
September 16, 2018
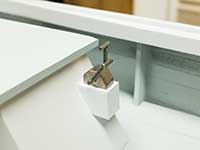
Today, I got the steering stick installed and rigged. Then, I made the gas tank.
 Steering Stick |
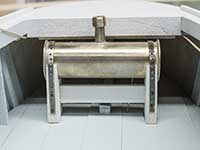 Gas Tank |
September 22, 2018
Working on details now. Here are few progress pics:
 Bow |
 Stern |
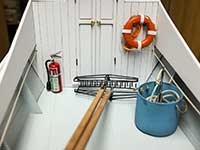 Bulkhead |
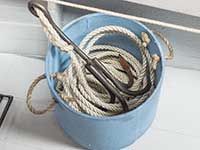 Anchor |
September 23, 2018
Spent the whole day making a 5-gallon bucket. I had a piece of 1" diameter plastic rod and I turned the bucket out of that, then painted it and sprayed on some diluted India ink to dirty it up some. It came out just a bit shorter than I intended, but I decided not to re-make it. That plastic rod is devilish stuff to turn on the lathe. I thought about making it from brass, and that would have worked well, I'm sure, but 1" brass rod is a bit expensive. I haven't decided if it will wind up on top of the engine cover yet, but it probably looks OK up there.
 5 Gallon Bucket |
 Bucket & Brush |
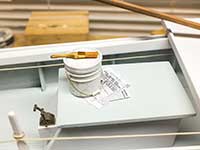
September 24, 2018
Today, I decided to make a paint can to use on top of the engine cover rather than the 5-gallon bucket. I'll put the bucket somewhere else. Next, I made the ships cat and, of course, there has to be a mouse.
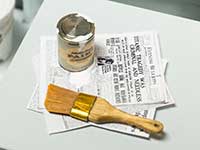 Paint Can |
 Cat & Mouse |
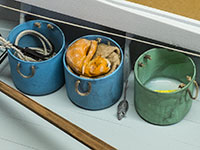
September 26, 2018
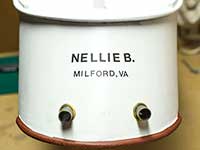
A few more details added. Today is my birthday (69! groan) so I think I'm calling this one done. I'll take beauty shots and post them soon. 2 months and 1 day to finish this one - not bad considering there were a couple weeks when I was working outside and not in the boatyard.
 Tools |
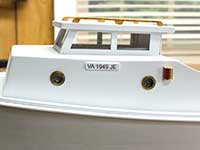 License Number |
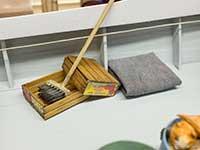 Crates |
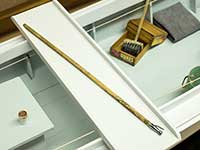 Boat Hook |
Copyright © 2025 - John H. Earl
All Rights Reserved.
Problems with the site? Contact the Web Master
Last Updated:
January 8, 2025