
> AVS CONSTRUCTION 1
> AVS CONSTRUCTION 2 > AVS ARTICLES > COLONIAL FERRY > COLONIAL FERRY 2 > CRAB SCRAPING BOAT > EMMA C. BERRY > ALMA > HANNAH > LARK > CLERMONT > NANTUCKET > PINKY SCHOONER > BUYBOAT > FLATTIE > ROUND STERN > BOATSHOP DIORAMA > POWER SKIFF > DRAKETAIL > HEAD BOAT > MINI ROUND STERN > MESSENGER > STERN CUTAWAY > SHALLOP > DELAWARE > SAILING SKIFF > ROWBOATS > WRIGHT SKIFF > F.D.CROCKETT > PRINCESSKITS FOR NOVICES TOOLS TECHNIQUES MUSEUMS LINKS ABOUT ME
I started this kit in April, 2003. As I did with Bluenose II, I documented the construction as I went along. My photos and notes will, at some point in the future, become a series of articles for Ships In Scale magazine.
The AVS is a kit that I think many beginners will find quite challenging if they have no experience with model ship building. I'd certainly recommend the absolute novice begin with one of the simpler Midwest models such as Crabbing Skiff for the younger crowd, or Sakonnet Day Sailer or Lobster Smack for the adult modeler. Although instructions for the AVS are quite good, they are hardly exhaustive and sometimes assume knowledge the first-timer may not have.
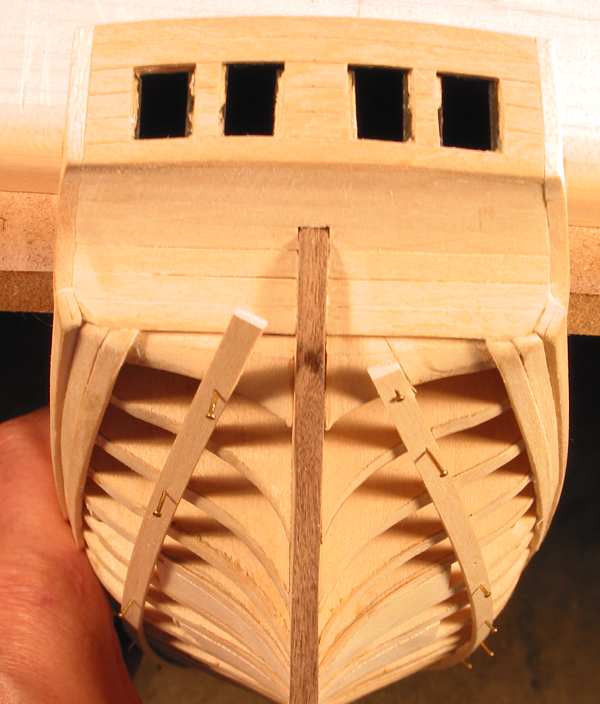
I did not kept track of my time on this model, but I tended to work several hours on it most days. I'd guess that it took a good 40 hours just to get the hull ready for planking. In addition to adding the bulkheads to the false keel, you have to build up the stern framing and add some filler blocks that have to be shaped properly.
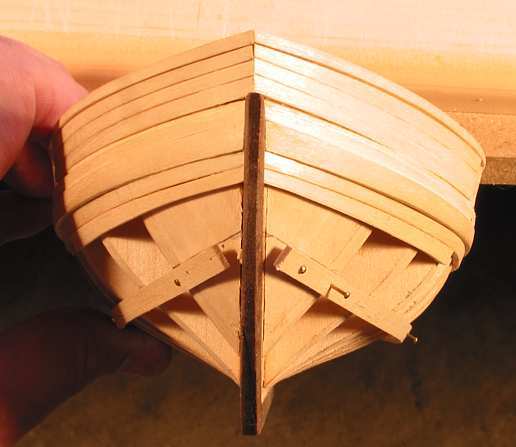
Planking is a slow process. The planks at the bow have to be spiled - the curve is too severe for simple edge setting. At the stern the planks have to bend almost 90 degrees - an area that I confess I had some difficulty with (as can clearly be seen in the picture below). I console myself with the thought that paint hid the worst of this!
In general, I managed to complete one strake on each side in about a 4 to 6 hour period. Seems like a very long time, but there's a lot of fitting, testing, reshaping, testing, etc. - especially with the spiled planks. In all, it took me 17 calendar days to finish the planking below the wale.
This model is designed to be double planked, but I chose to single plank. Generally, after I've spent the time to plank once, I don't relish the thought of doing it all over again although I do enjoy planking the first time around. Single planking has its own challenges though. The planking material is thicker and harder to bend - especially at the stern. If I were doing this model again, I might well consider at least double planking the stern.
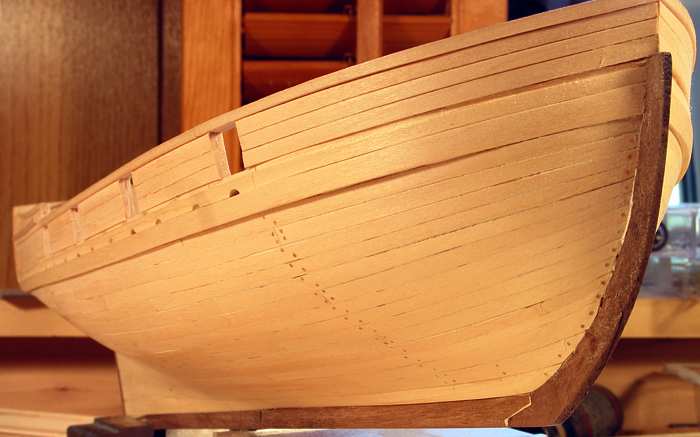
As you can see, I started to treenail the planking. I abandoned that idea pretty quickly. The treenails are completely invisible once the hull is painted and I think it's just not worth the effort. I don't believe they are necessary for the strength and integrity of the hull. Check back with me in 25 years and I'll let you know if I was wrong :-)
Planking the deck was a fairly labor-intensive process that took me several weeks to complete. The deck planks are separated by black paper to simulate the tar. Building and rigging the cannon was no quick job either. I'm VERY glad there are only 6 of those little suckers on this boat.
 May 19, 2003 |
 May 19. 2003 |
 May 19, 2003 |
 May 28, 2003 |
 June 01, 2003 |
 June 01, 2003 |
 June 01, 2003 |
 July 07, 2003 |
 September 02, 2003 |
 September 02 , 2003 |
View the remaining construction photos =>
Copyright © 2021 - John H. Earl
All Rights Reserved.
Problems with the site? Contact the Web Master
Last Updated:
April 3, 2021